In the confines of imaginary realms and the depths of digital dungeons, players find fertile ground for their creativity to blossom. Today, we stand at the crossroads of technology and entertainment, witnessing a revolution that not only redefines the way we play, but also how we shape our adventures. Join us in this universe, where tiny heroes and villains come to life through the magic of 3D printing.
In this article, we’ll delve into the challenge of manual labor of painting miniatures and building accessories, a task that demands patience and artistic skill. From the nuances of the details to the precision of the colors, each brushstroke and each glue applied carries with it the promise of bringing the most fantastic characters and scenarios to life. However, as with every great journey, innovative solutions emerge that ease the burden on miniature artists.
Explore with us a carefully chosen selection of 3D miniatures accessories, some of which can enrich the battlefield, while others will bring the creating experience to new heights. Get ready to discover how a 3D printer can transform the setting of your next adventure into a miniature work of art.
Magnetic Dice Box, Tray, & Tower
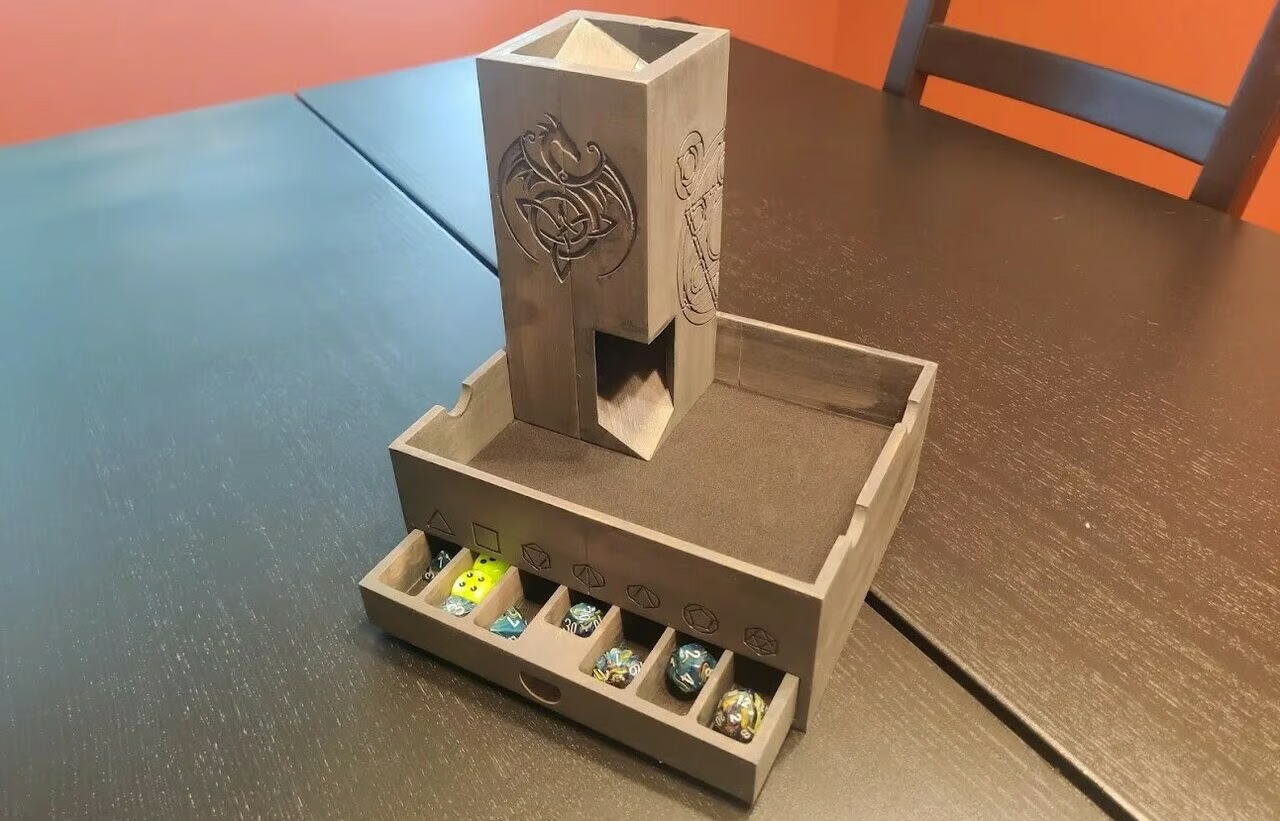
Amid the infinite possibilities offered by 3D printing, a multifunctional jewel emerges that delights the hearts of the most demanding gamers with a combination of dice box, tower, and tray. This brilliant creation also houses a drawer capable of holding seven different types of dice, from d4 to d20, in a standard set. Closing consistency and practical assembly are guaranteed by a set of carefully arranged magnets, whose polarity is clearly indicated.
To give this set a wooden look, the author used Hatchbox wood filament, adding wood grain textures to the look with a unique and handmade touch. But the secret is in the print settings. Make sure you have a print bed of at least 200 mm, as this part requires enough space for large part printing. Accuracy is key, especially when printing the drawer and turret parts, and tolerances of 0.3 mm are required to ensure a perfect fit.
By following the instructions and tips provided by the creator not just for printing but also for post-processing, you’ll ensure that your print is as functional as it is aesthetically appealing.
Print-in-Place Deck Boxes
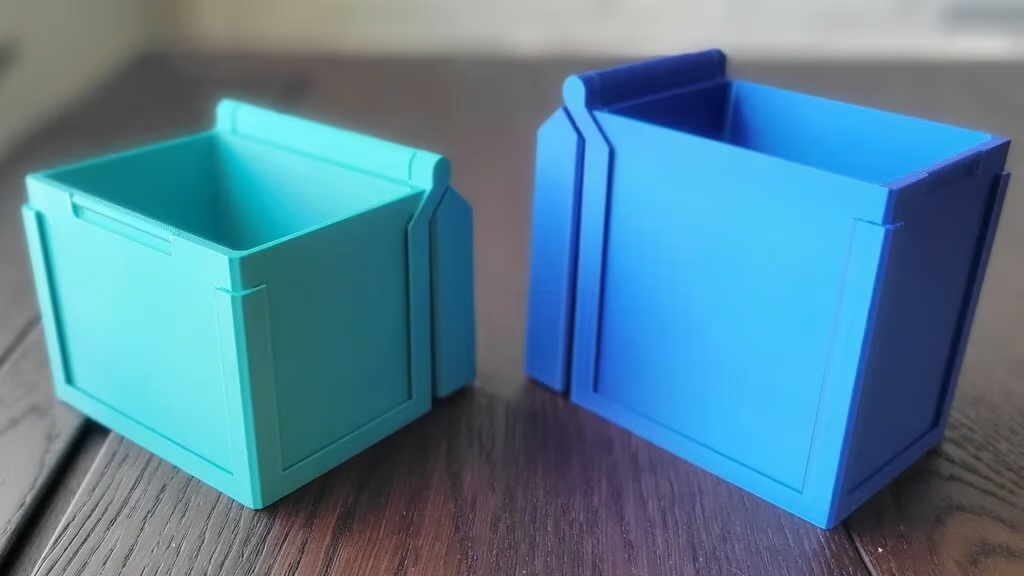
Among the wide range of accessories for card games, two simple card boxes stand out that are printed in place and close with a click! The maker included two versions: A vertical one, similar to most deck boxes on the market, and a horizontal one, a little shorter. Both have a slot in the front where you can insert a card for a special touch.
The designer included updates to both models. The horizontal box now has a version with a divider for 60-card decks and even some tokens or life counters. The vertical box now has a “Partition” version with multiple slots where you can place a printable separator (the file is also included). This way, the box can house decks of different sizes.
These last updates also include adjustments to make the lids more secure, but not so tight that they are difficult to open. Because of how tightly everything connects, you’ll want to make sure your 3D printer has good tolerances.
Card Holder
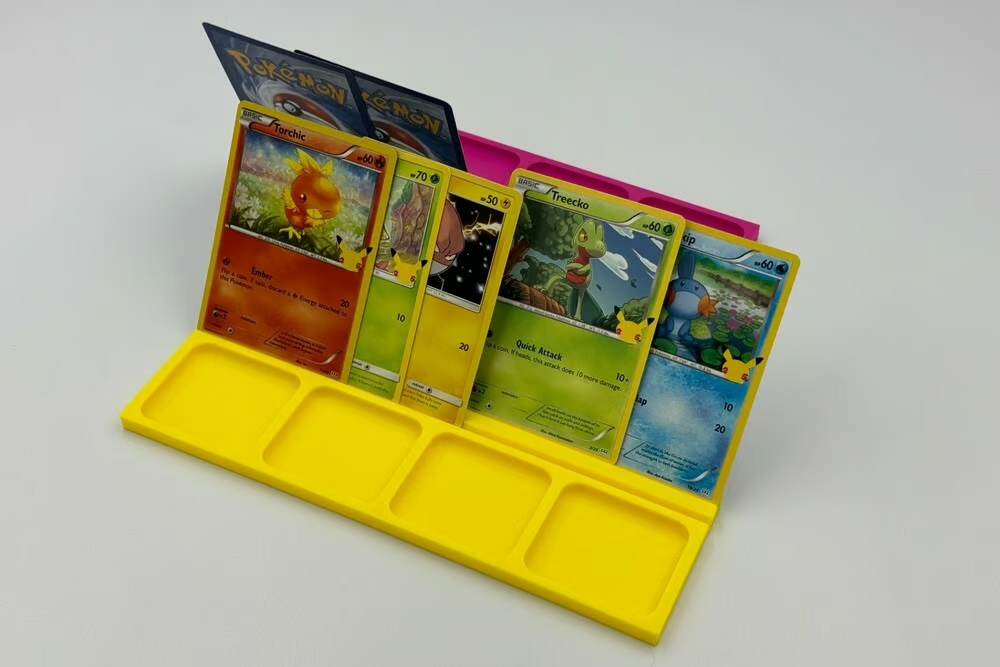
This design is a double-row card holder, ideal for storing a large amount of cards and organizing your fun. Additionally, it includes four resource trays, perfect for counters and pieces from various games. This accessory is an excellent choice for a wide variety of games, including those from the Ticket to Ride, Pokémon, Magic: The Gathering, Yu-Gi-Oh!, Catan, and many other universes.
With dimensions of 20 x 6 cm, this stand offers practicality and versatility to enrich your multi-table gaming experience.
The author didn’t leave any printing or configuration recommendations, but due to the simplicity of the model, you won’t need supports. However, adding a brim for additional grip can be a good option to prevent warping. It’s also important to adjust the print speed to ensure a satisfactory finishing quality, such as a speed between 40 mm/s and 60 mm/s (although this might change depending on your filament of choice). As for layer height, an average resolution of 0.2 to 0.3 mm is generally suitable for this type of part, ensuring a good balance between quality and print time.
Multigame Tokens Box
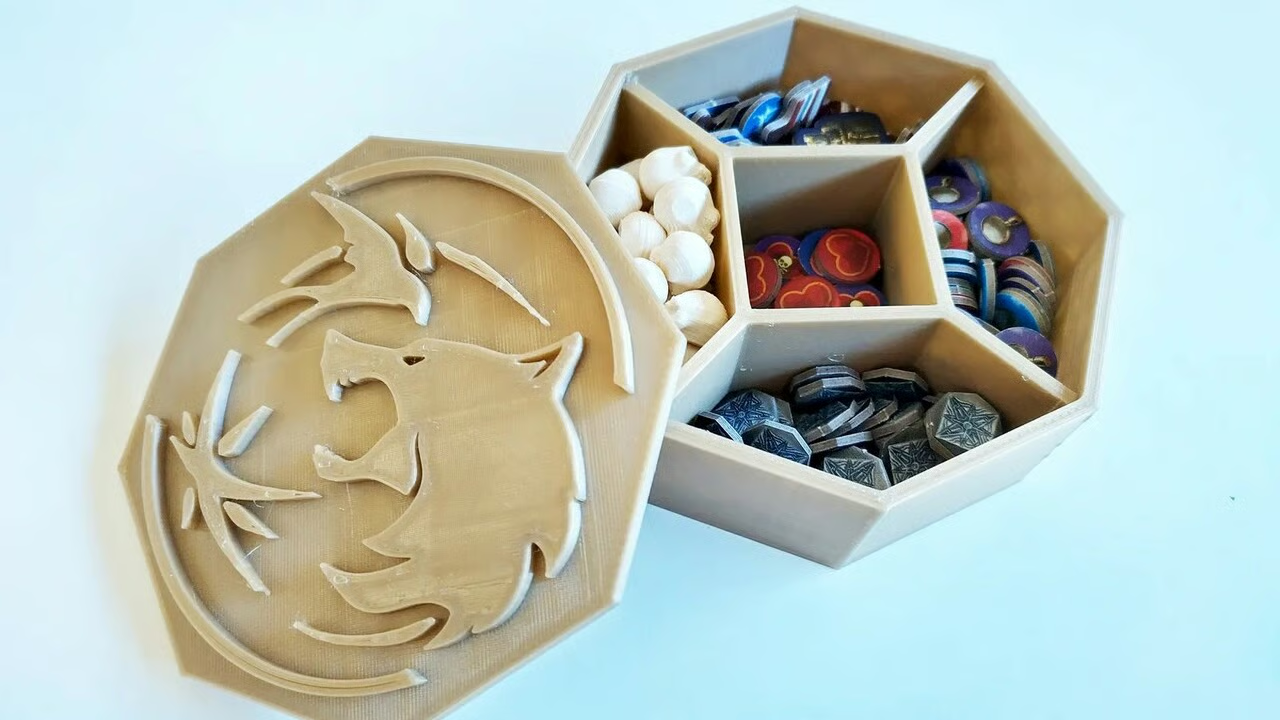
Updated in February 2024, this token box has been carefully crafted to meet the needs of players, providing practicality and versatility in a single accessory. With the ability to store tokens from different games in separate compartments with individual lids, this box offers a stylish solution for keeping your game pieces organized and protected between gaming sessions.
To print this, simply choose your preferred filament and select the design out of the four available that will suit your setup best. No supports will be needed, but as with the previous model, adding a brim could help avoid unpleasant surprises.
Rollup Dice Box
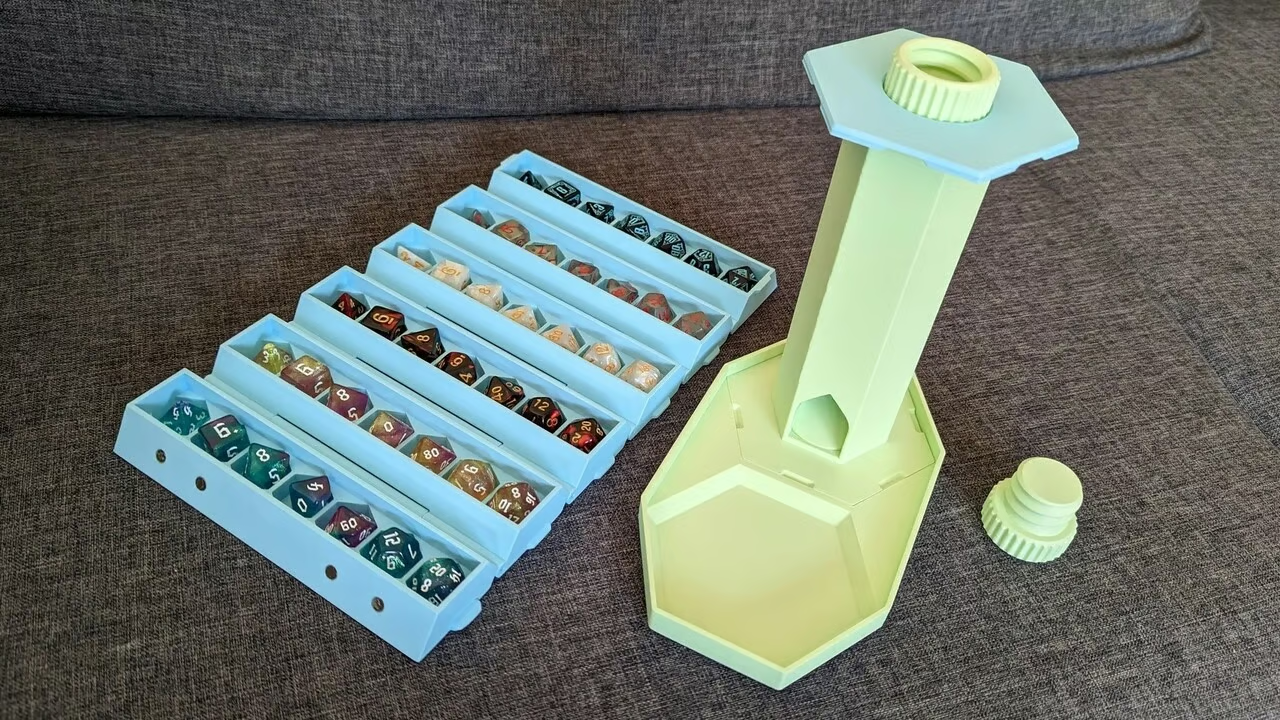
Introducing the Rollup Dice Box, a smart solution for storing and organizing up to 42 dice across 6 customizable trays. This box offers practicality and versatility for players looking to keep their dice organized between gaming sessions, and one of the versions includes a tower that you can take advantage of during a campaign.
Assembling this box is relatively simple, although you’ll need a bit of glue and eight 6- x 3-mm magnets for the start and end compartments to get them to fit securely. The six compartments will need some 1.75-mm filament to be held together, so it’s good use of scraps you may have from the end of the spool. To complete the assembly, align the top of the core with the base and press them firmly together – something that might require a bit of force. And if you need visual guidance, the designer included a useful video to follow.
Clicky Life Counter
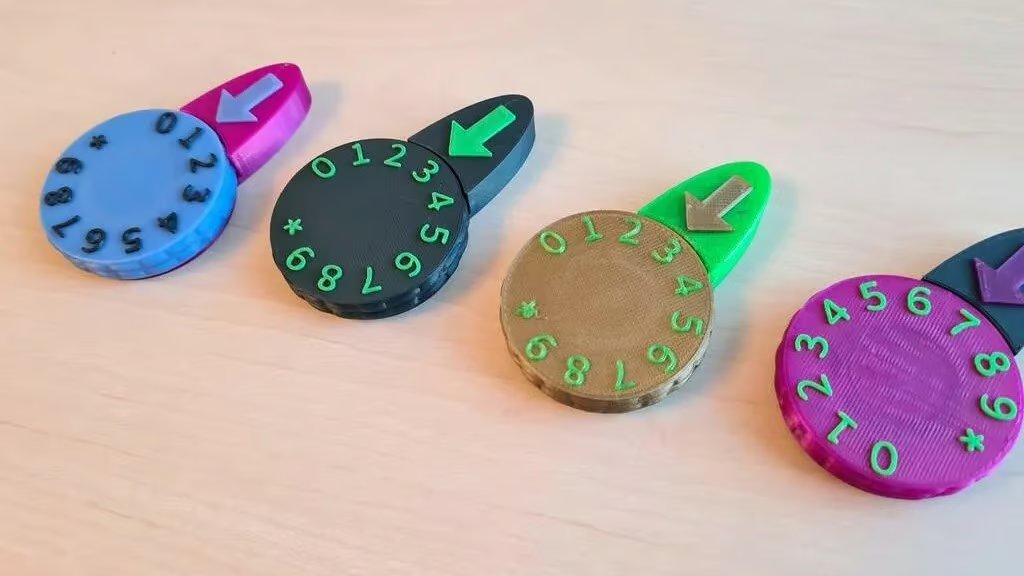
This is a handy little 12-sided life counting tool designed to support games where counting to 10 is essential. Ideal for games like Munchkin, this life counter also serves as a type of fidget toy, keeping fingers busy during moments of waiting or reflection. The second version has been designed for the user to explore a variety of colors and combinations between top and bottom by pausing at height and changing filament.
Printing this life counter is relatively simple, with four separate parts that can be sliced at a resolution of 0.2 mm with 20% infill. Assembly is easy, requiring only the insertion of the spring head into the spring and attaching it to the top, followed by attaching the top to the bottom. To ensure smooth operation, a small drop of oil can be applied to the thread, and the screw can be tightened using a small coin.
This life counter pays homage to KidSwiddens’ original design, with significant improvements to make it more compact, functional, and easier to use.
Paint Shaker Adapter
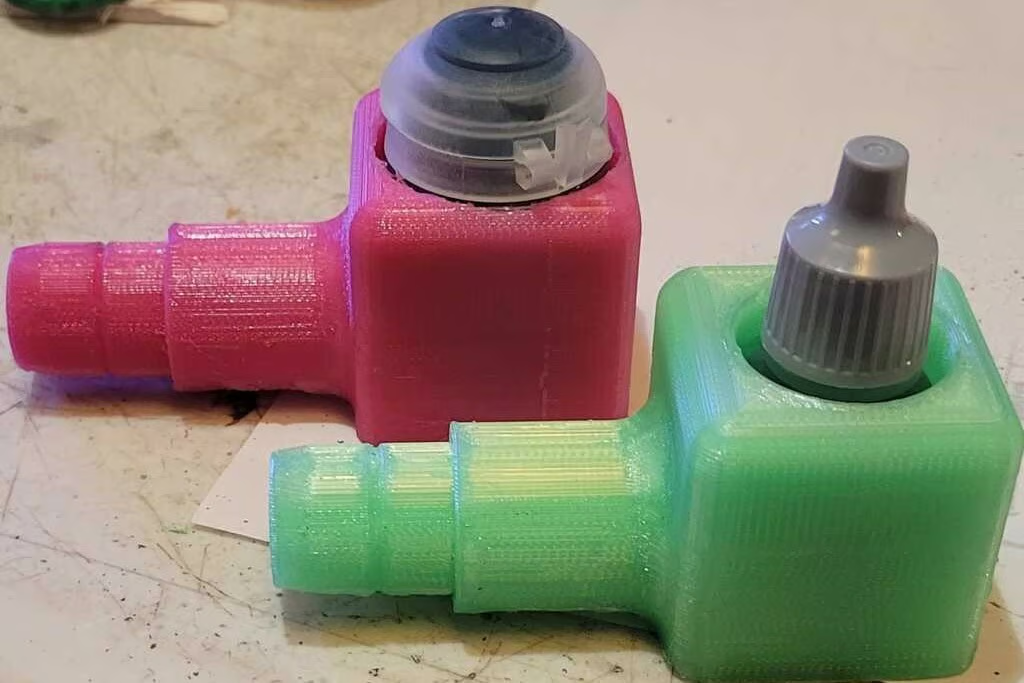
One thing that can happen to your paints if they’re based on thinners is that they separate from the pigment and settle at the bottom of the container, if stored for a long time. It’s not a pleasant surprise when you discover that many of the colors you’ll need are in this state – manually shaking them one by one will take some time and energy. To solve this, this model will help you a lot in a creative way.
It only requires an adapter to be used on a massage gun, which quickly transforms it into a creative paint stirrer. Before printing, check out all the measurements to make sure it will properly fit the device. Depending on the size of the paints, you might want to consider slightly reducing the size of the hole to ensure a more secure hold, as this may prevent items from vibrating too much or slipping out during use.
Weighted Base
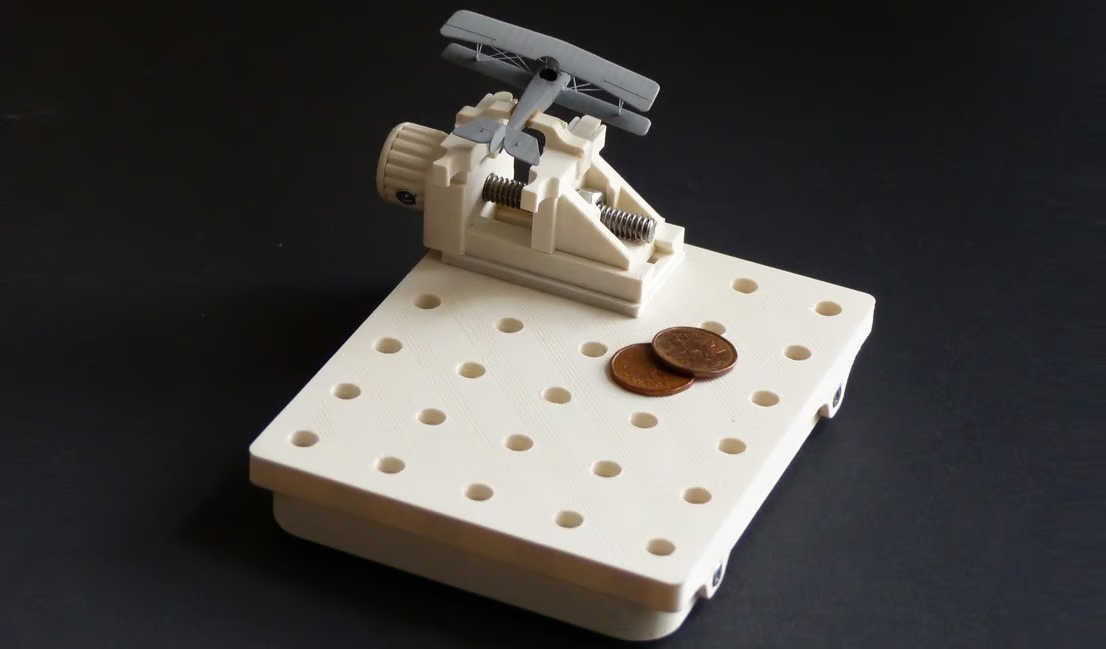
Some models are simply too small, light, and delicate to be painted with other conventional tools; this weighted base can be very useful for miniatures like the small and delicate plane in the image above.
The author also indicates links to three other accessories that he produced for this base, which are the small clamp, mini clamps, and airbrush stand. To add weight, this model has cavities in the perfect size for pennies, and this could be an opportunity to put those old coins stored in the piggy bank to use.
To create this weighted base, set the print resolution to 0.3 mm and 10% infill, ensuring adequate quality and a stable and resistant internal structure. It’s not necessary to use supports or rafts. Care should be taken when assembling the base: fill it with the coins and screw the pieces together with four #0 wood screws (4 x 1/2″), but be careful not to overtighten. Finally, add non-slip feet of your choice to the bottom surface to ensure stability during use.
Texture Rollers for Wargaming
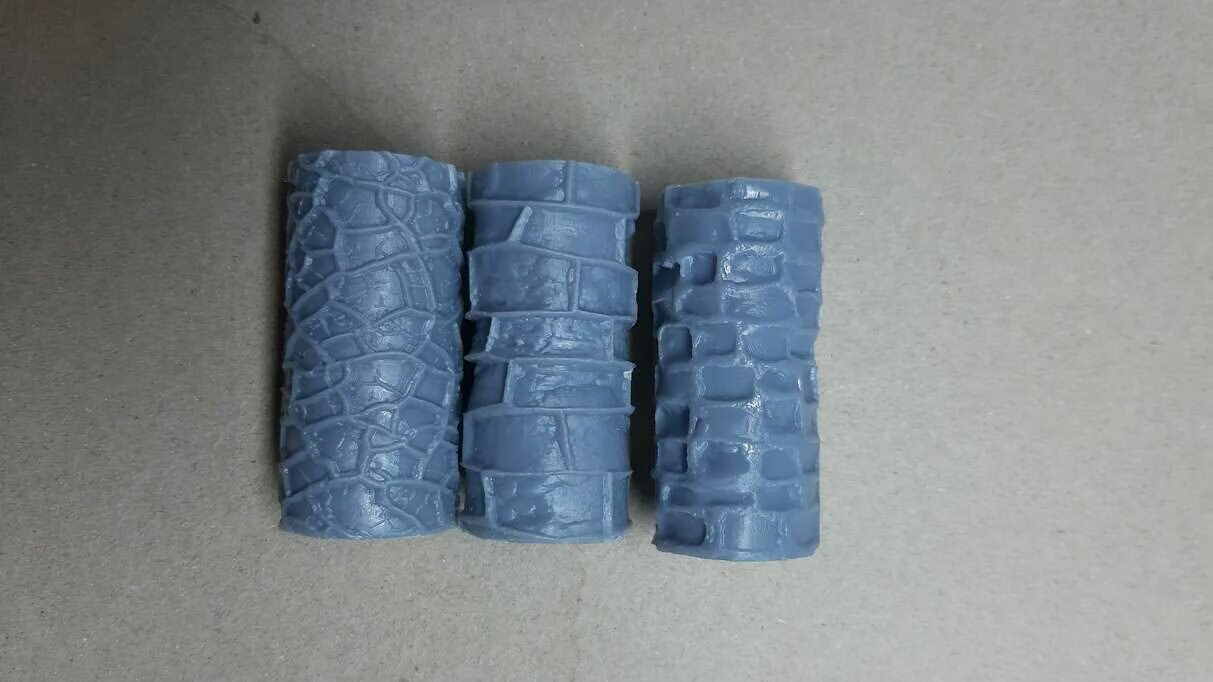
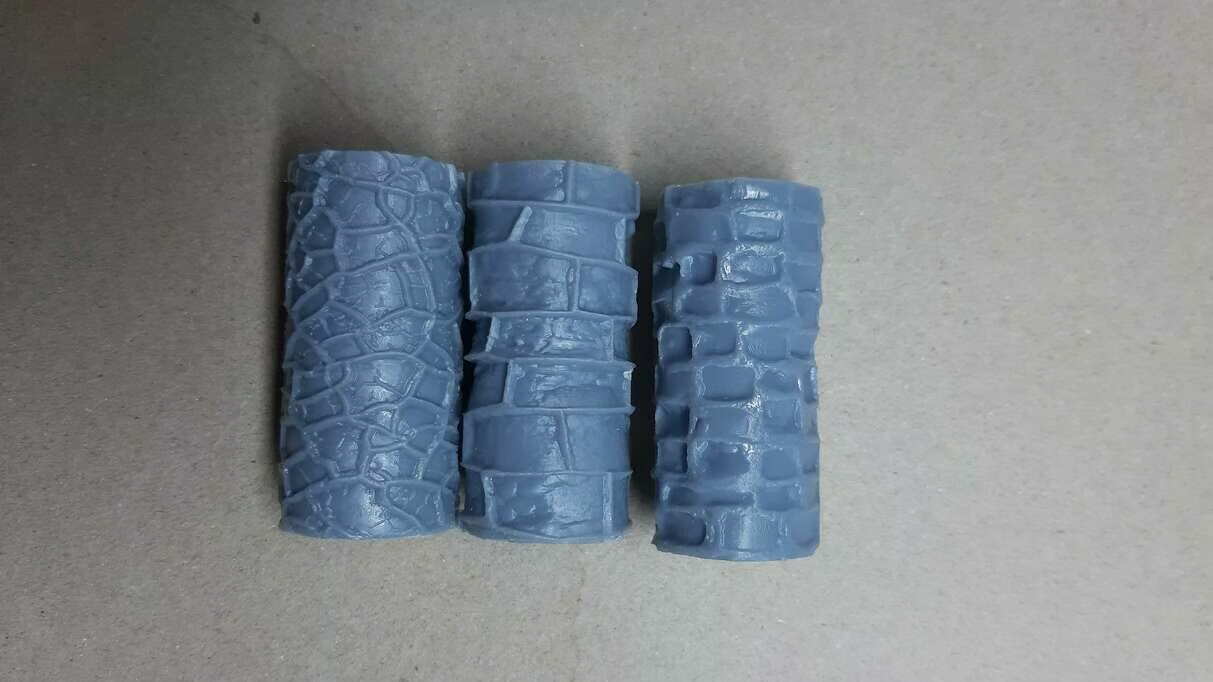
Texture rollers for wargames offer an effective way to create detailed, realistic scenes for your miniatures battles. With a variety of textures available, such as sidewalks, dry cracked earth, decorative walls, long bricks, and wooden planks, you can easily customize the terrain of your game board to suit your desired environment.
These rolls are designed to be printed on a resin printer for the best texture quality, but can also be printed on fused deposition modeling (FDM) printers with good results as long as they are printed in an upright position to ensure crisp detail. In addition, each roller comes with a handle to facilitate handling and applying the texture to the ground.
To use texture rolls, simply print the desired roll and handle on your 3D printer, following configuration recommendations such as a layer height of 0.28 mm and an infill of 20%. Be sure to add supports below the hinges that hold the roller to ensure a successful print.
Once printed, you can easily attach the roller to the handle, taking advantage of the spring action of the handle for smooth, consistent texture application. With these texture rolls, you can quickly transform your gaming table into a dynamic and immersive battlefield, taking your wargaming experience to a new level of realism and detail.
Small Parts Airbrushing Tray
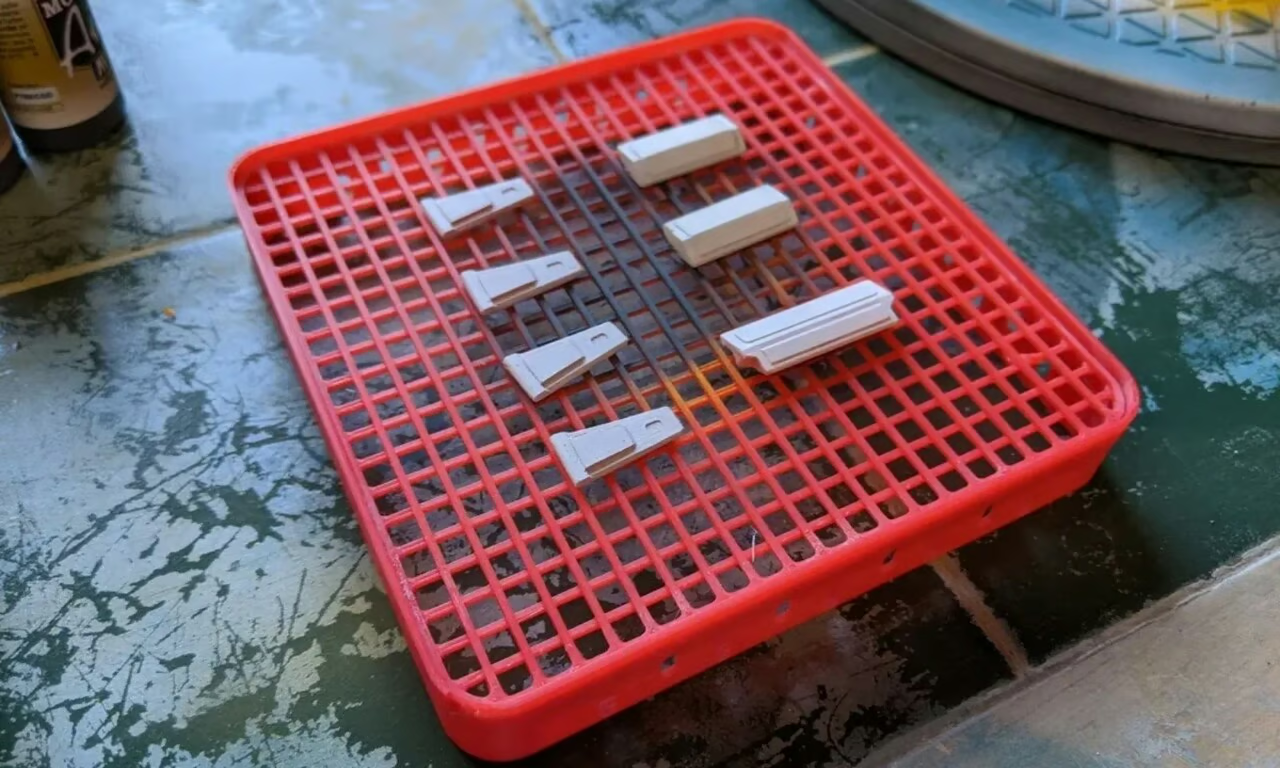
Introducing the Small Parts Airbrushing tray, a mesh tray designed by Andrew as a smart alternative to the airbrushing process. This tray offers an effective solution for holding and painting multiple small parts at once, providing a stable surface and eliminating the need to clamp them individually. With a mesh that allows air to pass around the parts, it prevents them from being turned or moved during the process, making painting small parts much easier and more convenient.
To use the tray, simply print the two parts on your 3D printer, following the designer’s recommended settings, such as a resolution of 0.2 mm and an infill of 15%. The dimensions of the tray are 125 x 125 x 20 mm, which should be enough space to accommodate several small parts at once. After printing, simply place the pieces on the tray mesh and get to airbrushing.
Airbrush Holder with Stackable Box
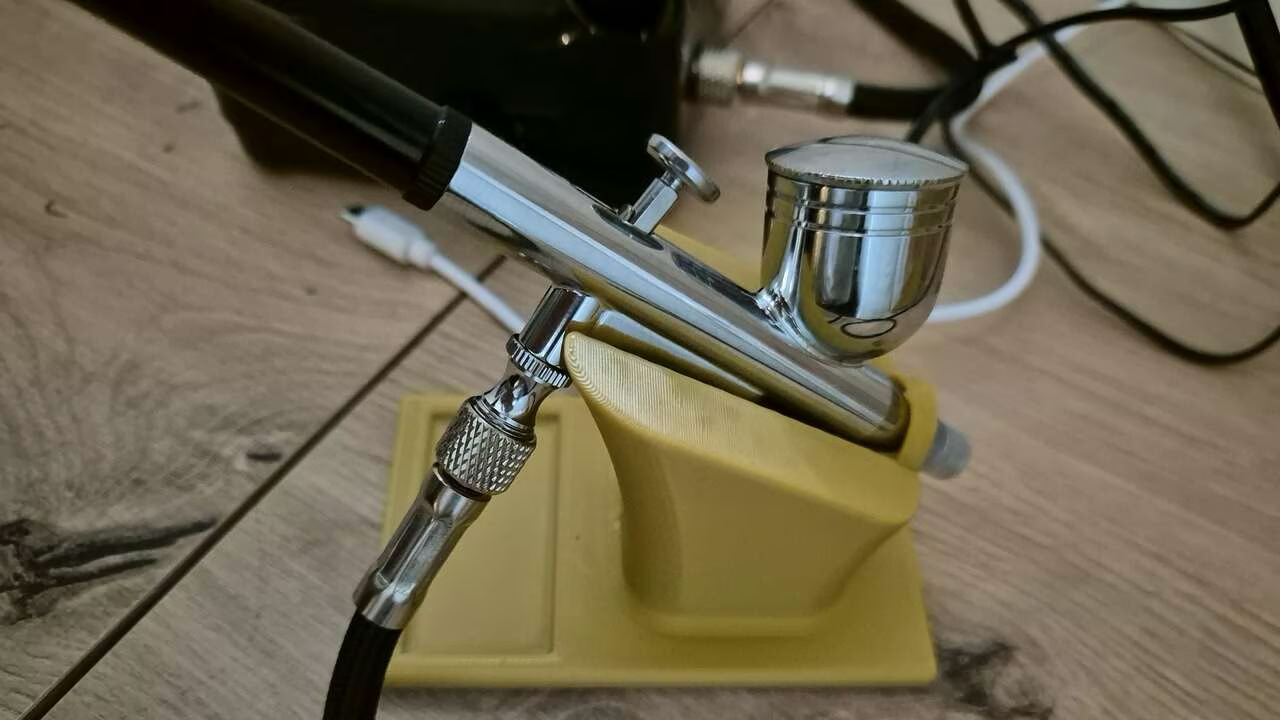
The airbrush is a tool that you can’t simply place on the counter without some support, and often the air hose makes it difficult to find a way to keep it while you need your hands free. This option can be perfect for adapting the table and keeping the tool safe so as not to make a mess with the paint.
This stand is specifically designed for Iwata airbrushes, but should work for many other devices (although some tweaking might be warranted). It has a lock to keep the airbrushes from falling out easily, and for a larger setup, it’s also possible to include 6- x 3-mm magnets in the existing holes of the boxes where you can store the airbrushes, if you want to stack them.
The designer includes models for 1-5 airbrushes, although it should be noted that only the individual stand can be stored in the accompanying box.
With this model, you can create a functional stand for your airbrushes and keep your work area organized and efficient.
Airbrush Cleaning Station
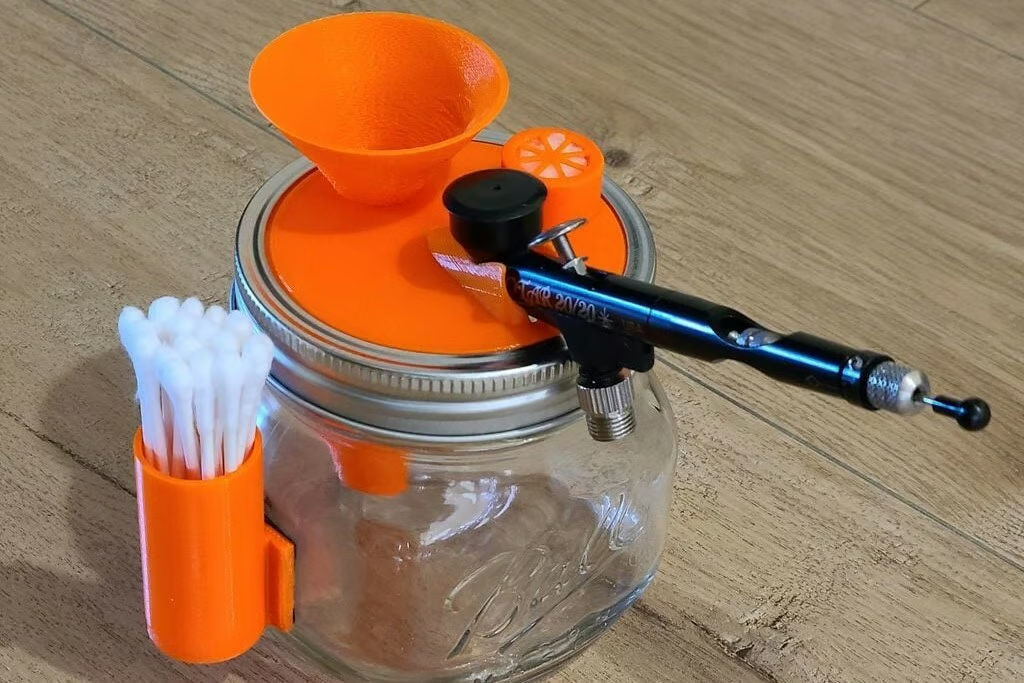
When using an airbrush and changing colors, it’s necessary to thoroughly clean up so that the colors don’t mix. While this is usually done with solvent, it can be messy and generate strong, toxic smells. To solve this problem, the airbrush support and cleaning station uses wide-mouth bottles, allowing cleaning without spilling solvent.
Designed for the Sotar 20/20 airbrush, it has a perfect fit and positive locking, making it easy to clean while it’s in the holder. The conical funnel is meant for emptying and rinsing the paint from the airbrush, while there’s a discharge tube that prevents spray backflow. In addition, there’s a filter section with a lid to prevent the release of bits of paint when cleaning the airbrush.
To bring this model to your workshop, print the tube and then glue it to the lower surface of the lid just below the funnel. The designer notes that it’s important to adjust the X and Y dimensions of the filter hole by 104.2% during printing to ensure the best fit because of PLA’s contraction. And, as you can see in the image above, the model also includes a cotton swab holder that can be mounted on the side.
Modular Miniature Holders
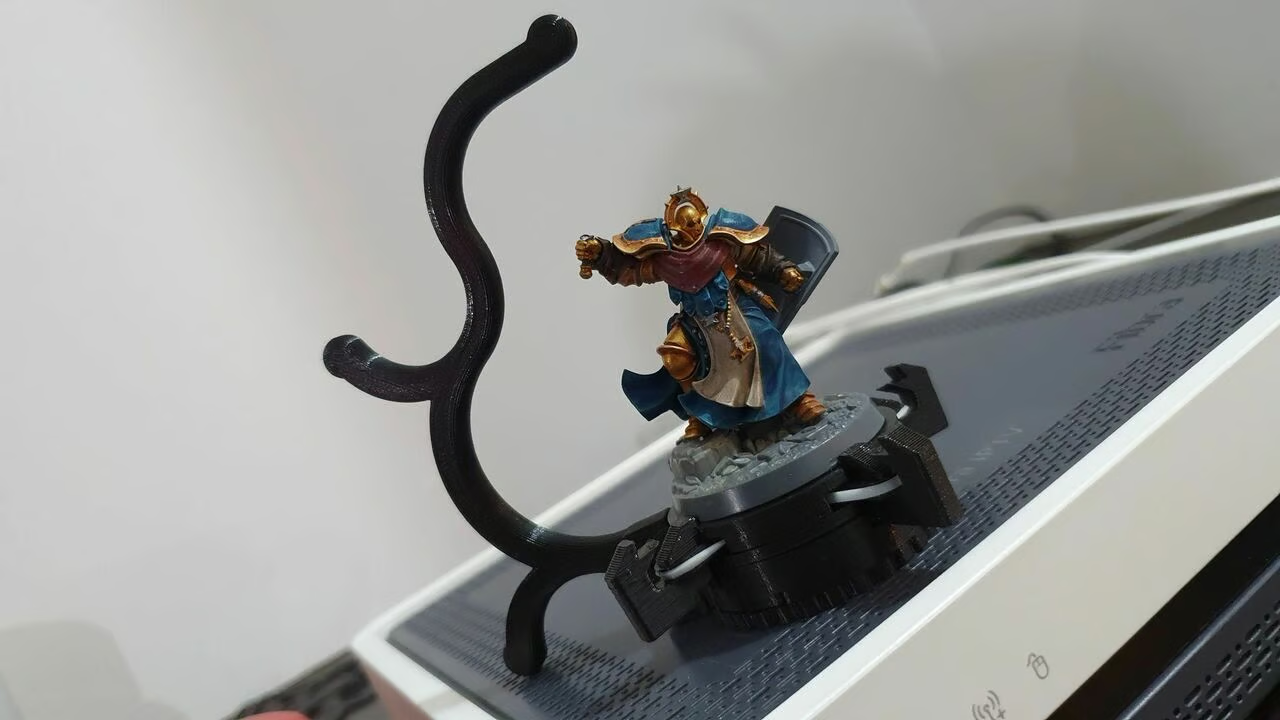
The MiniVICE Y-Series is a modular miniature painting station and stand system designed to solve common problems found with other available stands. With an innovative design, it uses a modular mandrel and a rubber band to hold the base of the miniature, allowing easy access during painting.
Furthermore, the magnets ensure a secure and quick connection between different parts of the system, offering flexibility to paint multiple miniatures at the same time. With adapters for round and square bases, the system offers versatility to meet different painting and hobbyist needs.
To print the MiniVICE Y-Series, you won’t need any supports. While most parts can be printed with 0-20% infill, the base may benefit from a higher percentage for a sturdier and more reliant experience.
After printing, assembling the parts is simple and only requires the insertion of pins, magnets, and fixing some parts with glue. Just be sure to check the polarity of the magnets, as this is crucial to ensuring correct assembly.
Once assembled, the system is ready to use, allowing for a more efficient and organized miniature painting experience.
Customizable Painting Station
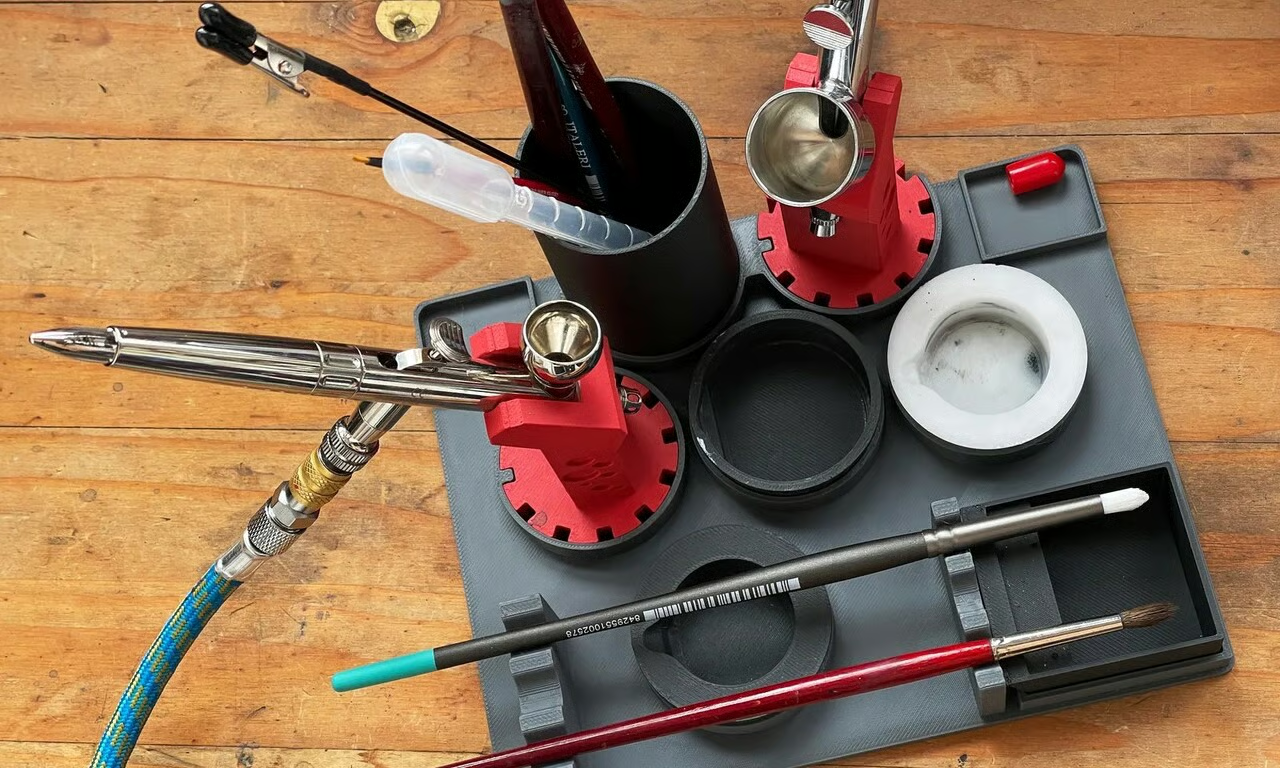
Sometimes something fixed and permanent can be right; other times, to organize small spaces while keeping everything you need close at hand, a customizable and upgradable paint station can be a better solution.
Designed for hand or airbrush painting, this station is as straightforward to print as it gets. With features such as brush rest slots, small cleaning containers under the brush tips, and storage spaces for paint and tools, it offers a complete solution for model making and painting enthusiasts. Plus, the airbrush support has 12 angular positioning options, ensuring comfort during the painting process.
To 3D print this station, the designer shared that they used a layer height of 0.2 mm, 3 wall layers, 4 lower layers, 4 upper layers, and 20% infill. No issues were noticed, so sticking to these should yield good results. The base is quite thin (3 mm), so if you want a more robust configuration, you’ll want to increase the infill or opt for a sturdier pattern.
You can print the main base and then only the parts you really need in the desired quantity. With all printable items unsupported, it gives you the flexibility to tailor the station to your specific painting and hobby needs.
Customizable Paint Rack
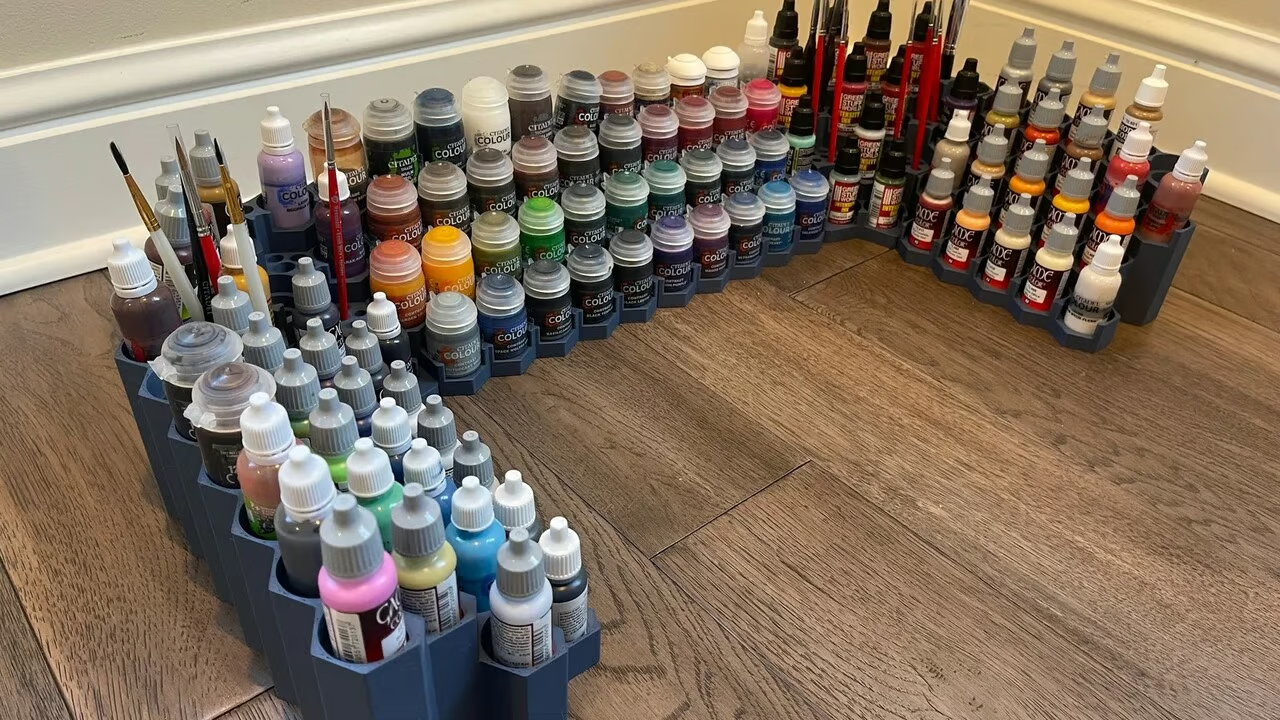
A wide variety of colors and paints are necessary to give realism to your scenes and heroes, but organizing this isn’t always so simple and easy to achieve without a suitable location.
Yes, you can leave everything on tables and shelves, but over time and use, things can easily get out of control and even end up making messes. To solve the problem, this rack offers a practical and efficient solution, adding an element that works for both left and right corners and is hollow to use less material.
When it comes to the 3D printing side of things, the designer recommends at least two to three layers of wall and infill of 5% or more, depending on your preference for strength and durability. With the ability to print quickly and without the need for supports, it’s easy to produce and adapt as needed. You can print the main base piece and then just the parts you actually need to fit the stand to your specific space and needs.
